WhenWise
Simplify bookings, reach for more customers
Invocing and Payment
If your business is confgured to accept online payment, the invoicing and payment for online booknig are automaticaly handled by WhenWise. This chapter shows how to manage invoice and payment manually (with flexiblity such as discount) in WhenWise.
- Enable Invoice add-on
- Create Invoice
- Add/Edit/Remove billing items
- Manage invoice billing items
- Apply discount to the whole invoiced amount
- Quick Edit Invoice
- Record payment
- Edit Invoice
- Delete Invoice
- View invoices
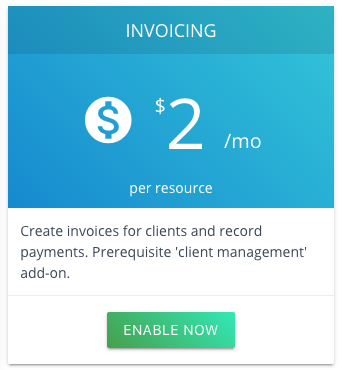
Enable Invoice add-on
Invoice add-on is available for businesses on Professional plans (included in Premium plan). Go to ‘Billing’, click ‘Add-ons’ and enable the ‘Invoicing’ there.
Create Invoice
There are 3 ways to create a new invoice:
- Online users makes booking and pay it online
- Receptionist creates an invoice for a booking
- Receptionist creates an invoice for a customer directly
Create Invoice for a booking
Once a booking is created, internally or online, you may create an invoice. Open a booking on diary.
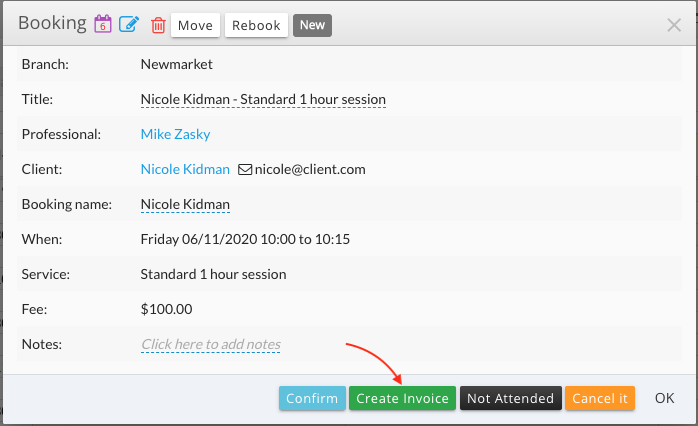
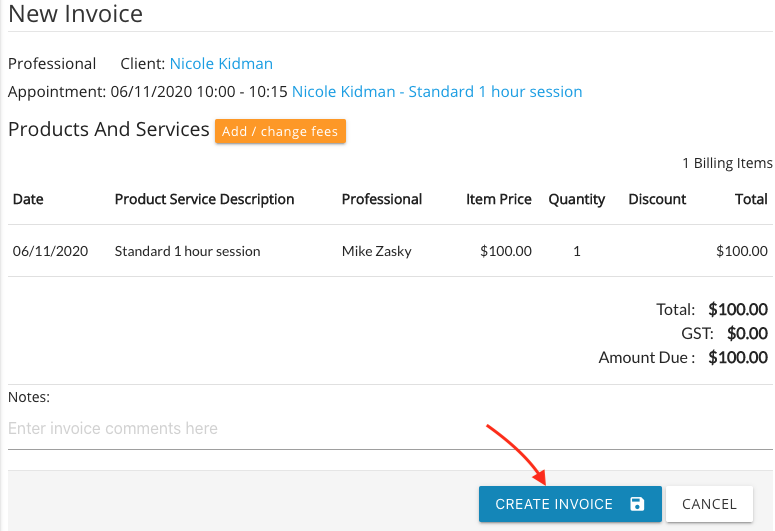
The fee item will be pre-popluated base on the booking. Unless you want to make adjustments (see a section belew), just click “Create Invoice” button.
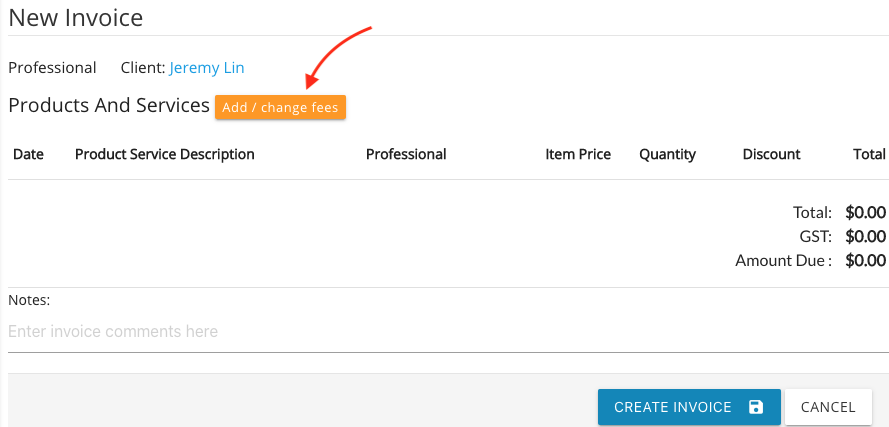
Create Invoice for a client directly
You can create an invoice for a client directly instead of creating it from the booking diary.
At Client page, click “New Invoice” button next to the customer’s name:

Add/Edit/Remove billing items
Click “Add/change fees” button to add/edit/remove fee items for an invoice.
Type in Billing Code to find the billing item, select quatity (Qty), click “Add”.
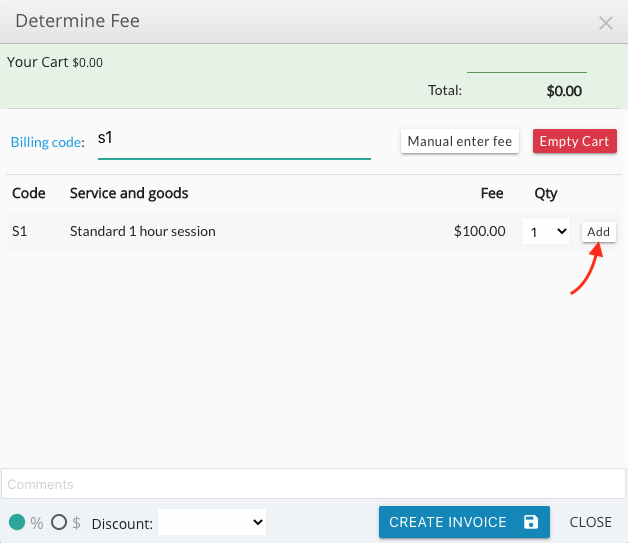
For the same type of billing items, WhenWise will group them.
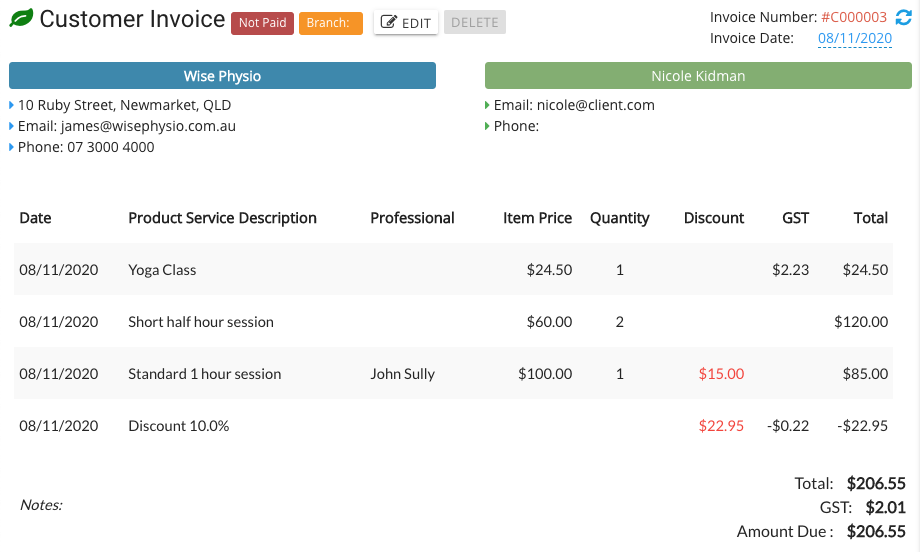
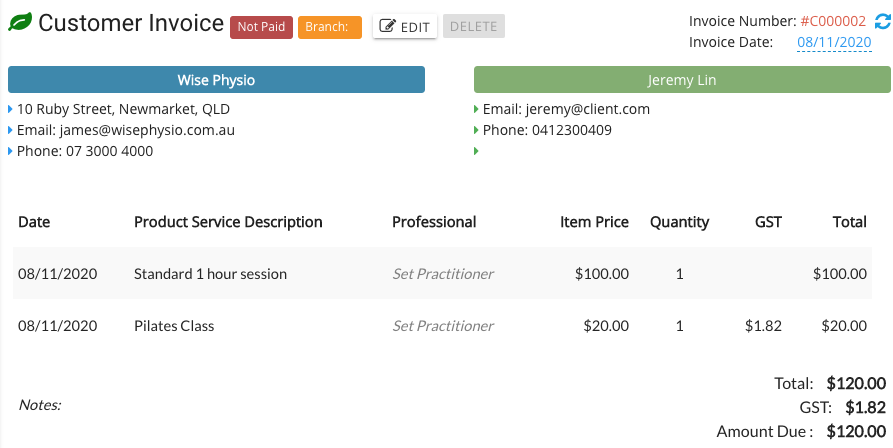
When it looks all right, click “Create Invoice” button, you will see the invoice page. You still can edit the billing items after the invoice has been created. The below is an example with multiple billing items with discounts (see the next section)
Manage invoice billing items
A invoice consists of one or multiple billing items. One billing item is typcially a service or product provided by a resource, such as an appointent with a physio, an exercise equipment sold by a physio or a driving lesson with a driving instructor. Once a new invoice is created, you may add/remove the existing items.
Add/remove billing items
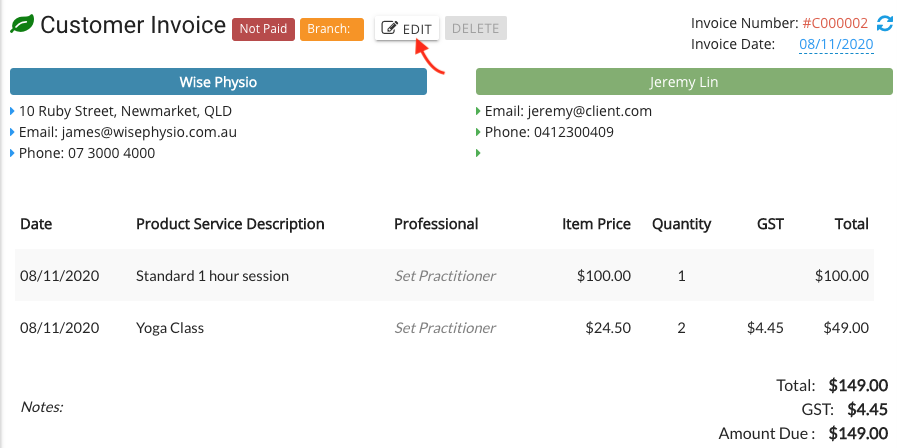
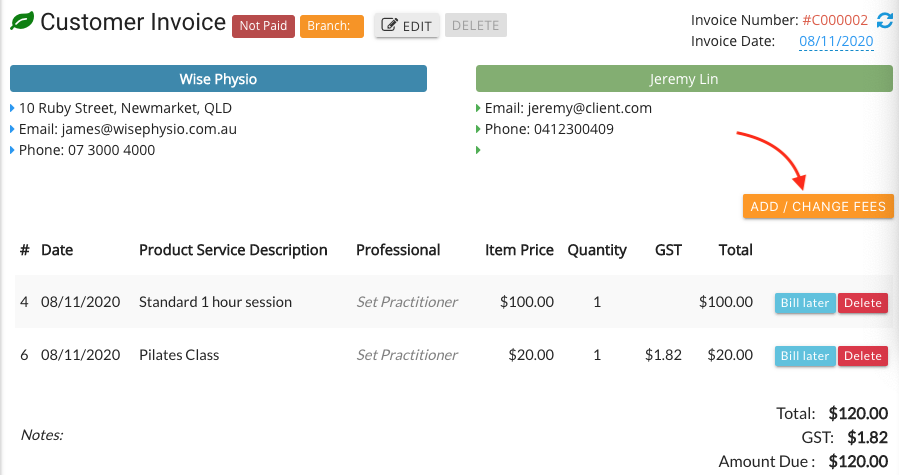
While in Invoice page, click “Edit” button to edit the invoice.
Click “Add/Change Fees” button to add more billing items or click “Delete” button after the billing item to delete that item.
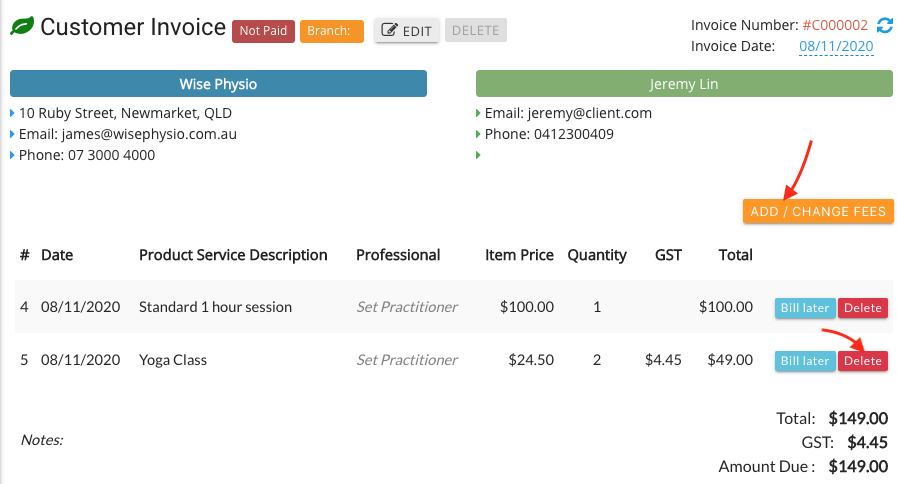
An edited invoice (after add and delete a billing item respectivly) is created:
Manage line item discount
Admin can offer the discounts to the invoice. It can be either the billing item discount or the whole invoice discount.
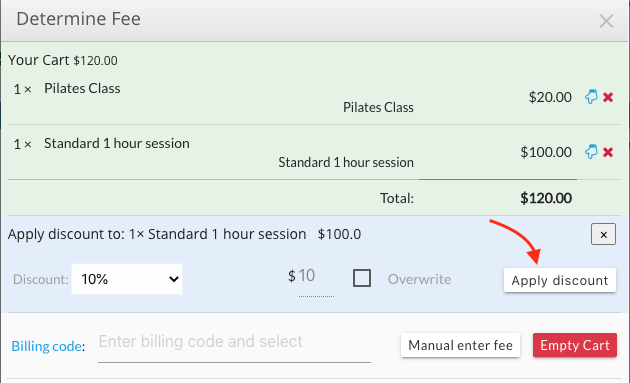
For billing item discount, click “Add/Change Fees” button after click “Edit” on the invoice.
In “Determine Fee” window, click the below image next to the billing item to add discount.
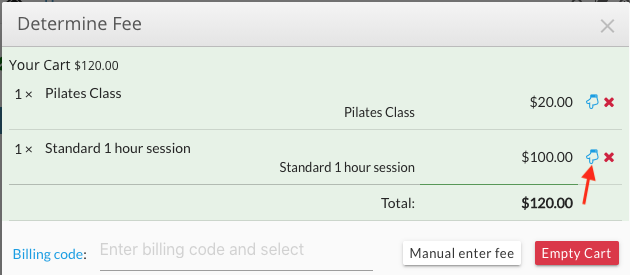 .
.
Click dropdown list at “Discount” and select the discount percentage.
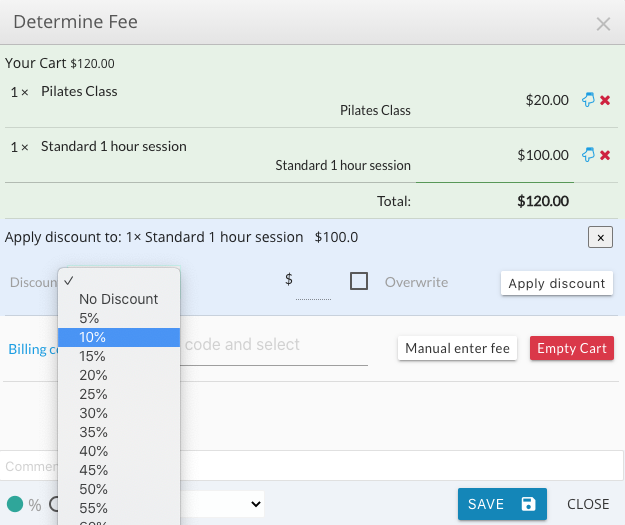
Click “Apply discount”:
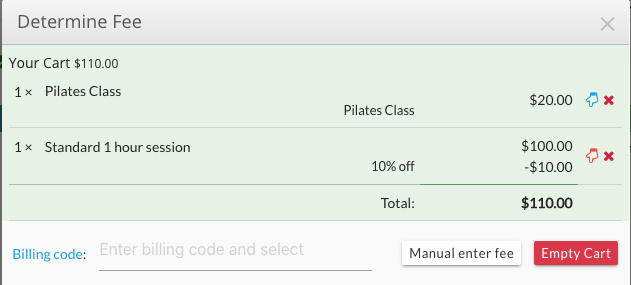
Discount has been applied to the billing item and the whole invoice:
Apply discount to the whole invoiced amount
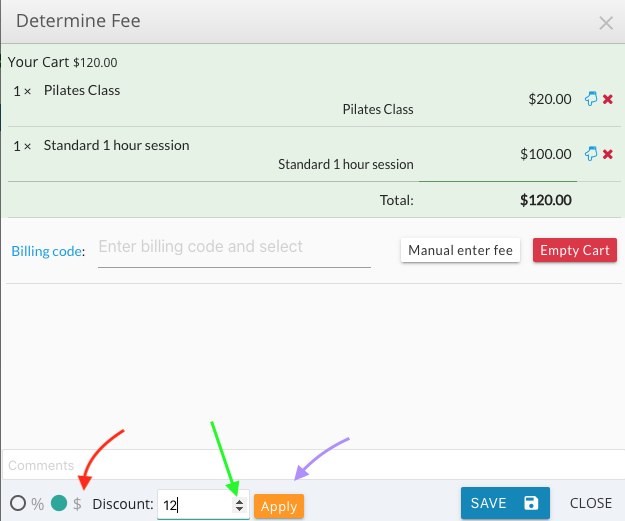
If you want to apply the discount to the whole invoice including all billing items, use the Discount dropdown list at the bottome of Determine Fee page.
You can select the discount in percentage or fee amount by checking the “%” or “$” sign.
Percentage discount
When offering the discount in percentage, the process is the same with offering the discount to the billing item. After select the percentage, a new Determine Fee window will appear.
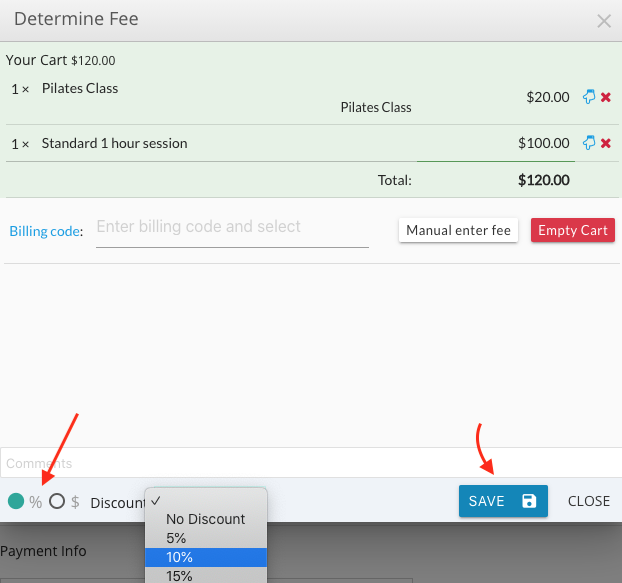

click “Save”, the discount will be applied to the invoice.
Fixed discount amount
When offering the discount by the fee amount, check “$” sign, use “up” and “down” arrow to get the right figure or simply type in the figure. Then click “apply”.
The revised fees after the discount by deducting the fee amount:
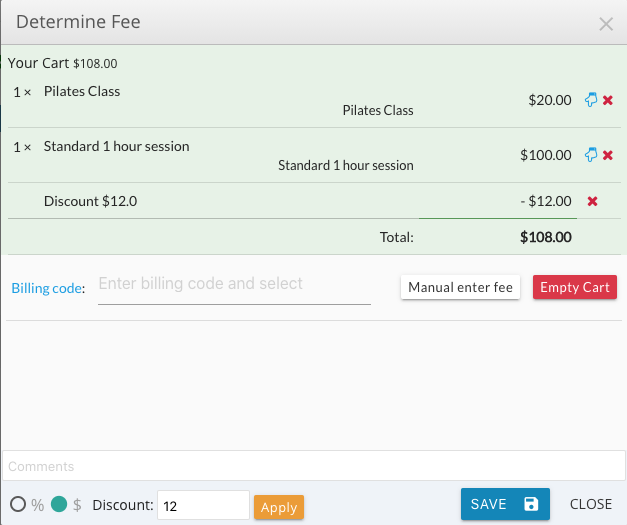
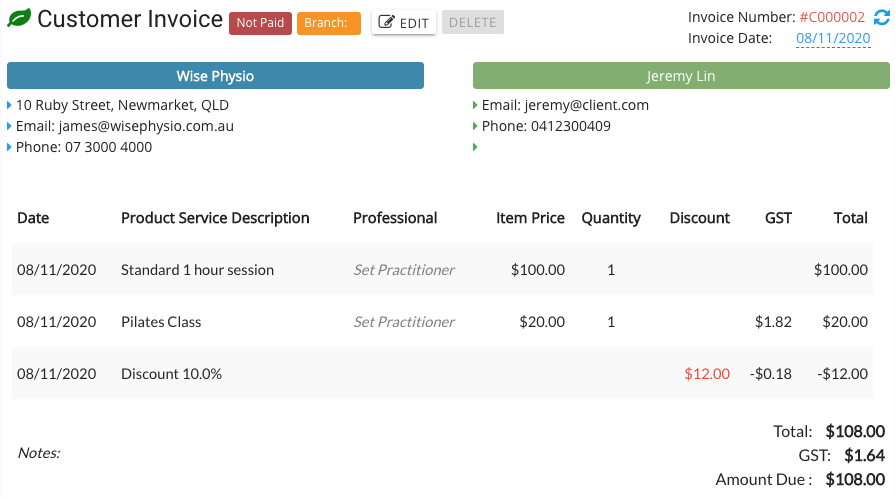
After click “Save”, a new invoice with revised fees is shown:

Quick Edit Invoice
After an invoice is created, some areas of the invoice can be edited quickly.
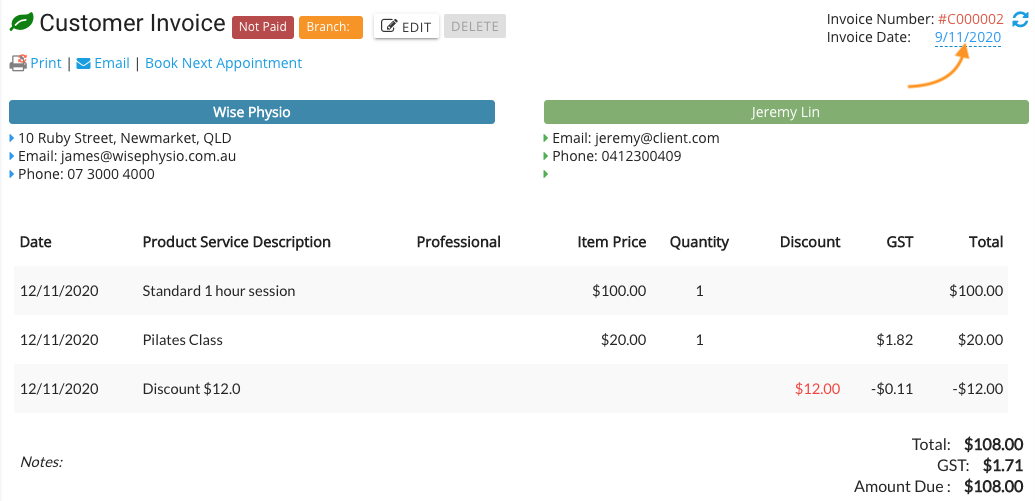
Change invoice date
If you want to change the invoice date, click on the date indicated with an arrow.
The date will be ready to change.

After type in the new date, click “tick” button.

Now the invoice date has changed.

Change invoice notes
The note on the invoice can be quickly edited too, as per invoice date quick edit.

Record payment
The payment can be processed at the bottom of the invoice page:
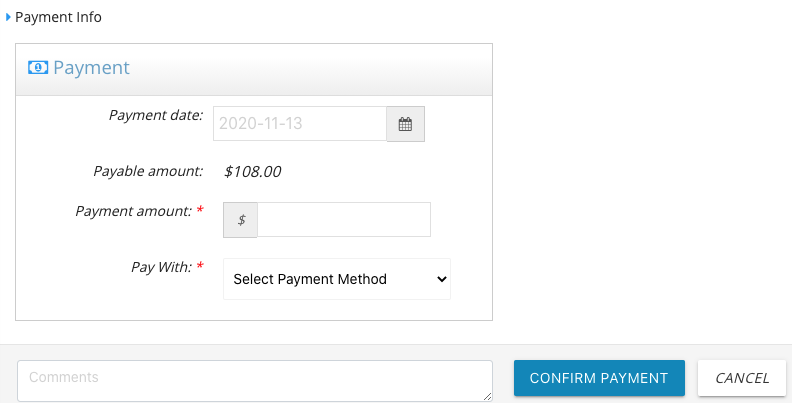
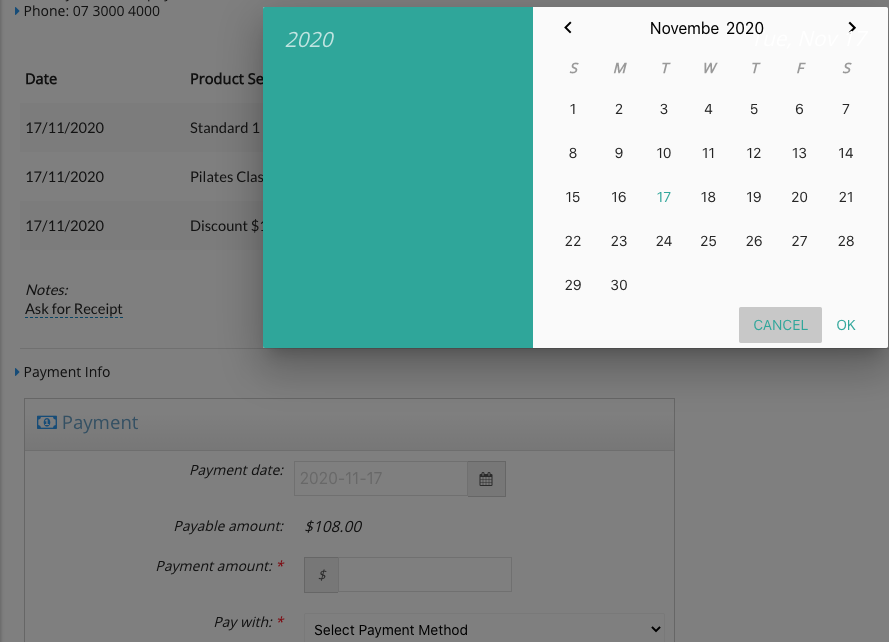
The default payment date has been grayed out. If you want to change it, click in the date box, a calendar will show for you to choose the date.
### Full payment
If pay the invoice in full, enter the exact payable amount in the Payment Amount box. Select payment method from the dropbox. Then click “Confirm Payment”
 .
.
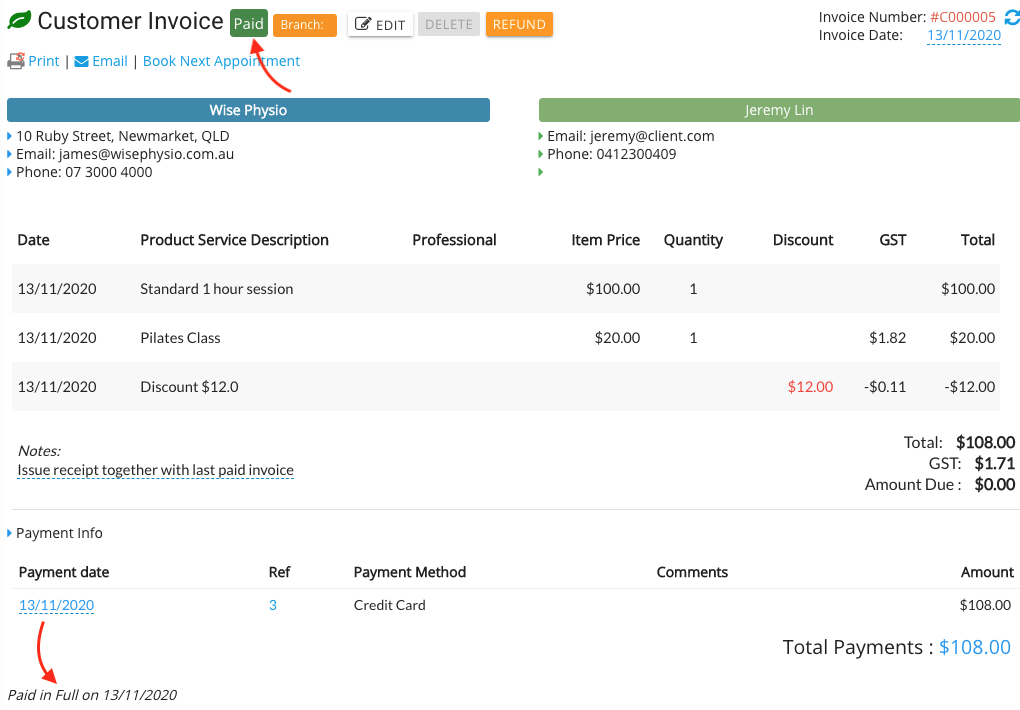
Now the Customer Invoice will show that it has been paid.
Partial payments
You can also do partial payments to the invoice.
After enter the amount you want to pay (eg. $50) and select the payment method (eg. Cash), confirm payment. The invoice is now shown “Partly Paid”. and total payment amount. Now the Payable amount is changed (less the amount just paid)
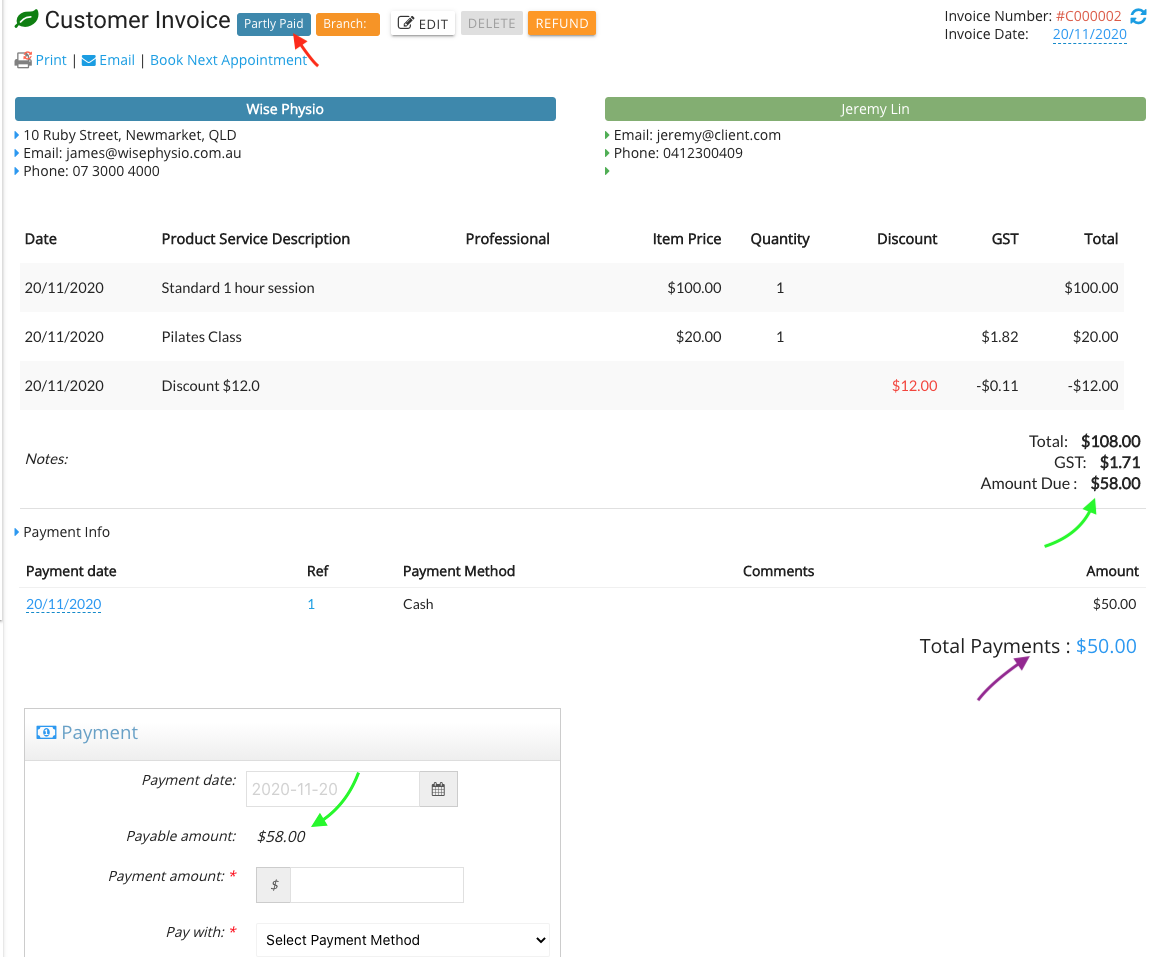
You can continue to pay the remaining amount of the invoice or close it. In the Invoice tab, this invoice will be marked as “Party Paid” as below image:

Click on the invoice number to open the invoice. You can then process the remaining payment.
Edit Invoice
Apart from quick edit to the invoice, you can edit the other items on the invoice.
Open an invoice, click “EDIT” button next to “Customer Invoice”. The invoice is ready to edit.
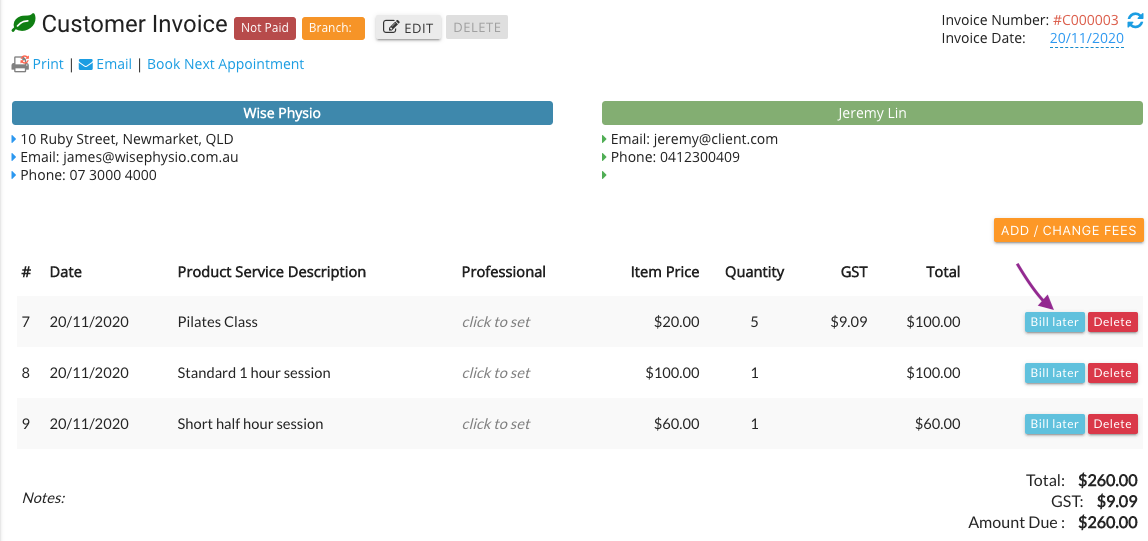
On the invoice, you can delete a billing item or Bill later.
Add/change billing items for an existing invoice
After click “Edit”, you will see an orange tab “Add/Change Fees” Click on it to open the window of “Determine Fee” to add more billing items. Click “Save”, the invoice will include any newly added billing items now.

Delete billing items
In “Edit” mode, click “Delete” at the end of the billing item to delete it.
Save a billing item for later
Click the blue button “Bill later” on the first billing item,
The billing item disappeard from the invoice. However, there is a black tab with wording “Existing Billing Items (1)”
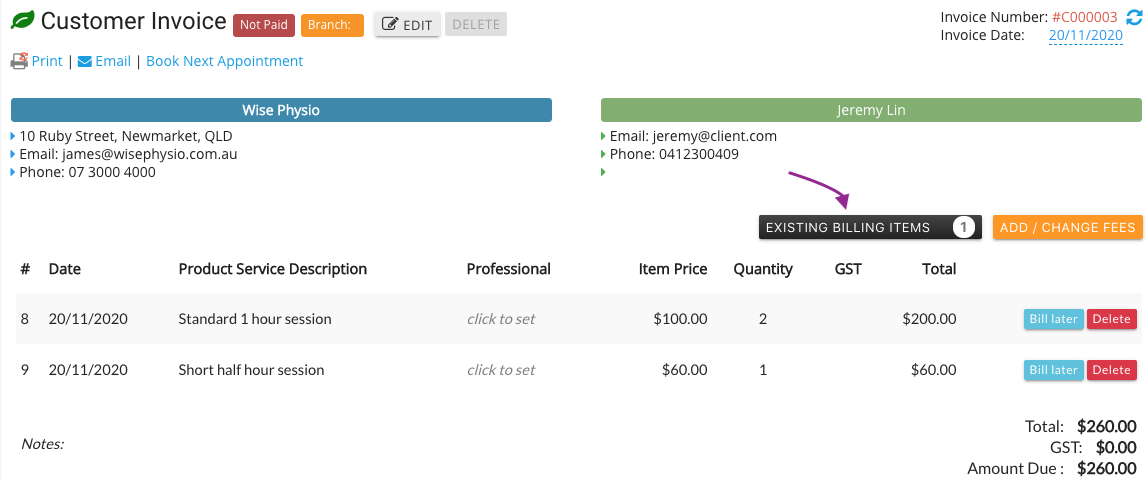
Click on the black tab, the billing item appears on the invoice with a green tab at the end “Add to this invoice”

Click “add to this invoice”, the billing item will be added back to the invoice. Click black tab “Existing Billing Items” again, the billing item will stay as “bill later”.
Delete Invoice
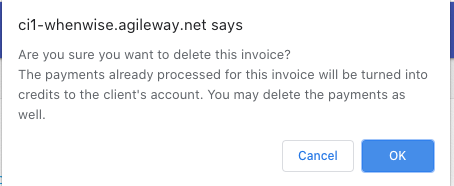
In order to delete an invoice, delete the billing items first. All all the billing items are cleared, the “Delete” button next to “Edit” button will be activated.

Click “Delete”, a window popped out to confirm the deletion. Click “Ok”, the invoice is deleted.
View invoices
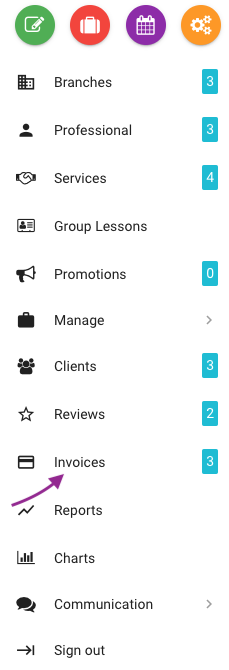
View all invoices
View all invoices from the “Invoices” tab on the left side.
View one client’s invoices
Under client’s profile, click “Billing” tab, the list of invoices, payments and balance will be displayed.

© 2006 - 2026 AgileWay Pty Ltd. Powered by SiteWise CMS