BuildWise
Continuous Testing Server with Functional UI test execution in parallel
All Platforms
Install BuildWise Server
In previous chapter, you can see a BuildWise standalone, a pre-packaged one-click installer for Windows platform.
- Prerequisite
- Install BuildWise server on Windows
- Start up server
- Install BuildWise on Mac or Linux
- BuildWise working directory
Prerequisite
-
Ruby and required Gem libraries
BuildWise is developed in Ruby, a Ruby runtime (recommend v3.2.2, direct link for Windows platform) is required.
After installatin Ruby, run
gem-install.shorgem-install.batto install the gems required for BuildWise. -
The most widely used source control system. BuildWise server supports Subversion as well, but for simplicity, Subversion support is turned off by default.
-
Install standard (and free) MySQL Server Community Edition (the version used in screencast: 5.7.11). Remember the password you set for
root.Also you may be required to install Visual C++ 2013 redistribution package for Windows server editions. In this case, google the package and install the 32-bit version.
-
Your test project in Git
If you don’t have one yet or looking for an example, you may use https://github.com/testwisely/buildwise-samples.
-
Selenium WebDriver requires dedicated driver software for drive the browser, for example, ChromeDriver for Chrome, geckodriver for Firefox, …, etc. The installation is simple: just download the binary and put into your PATH.
Install BuildWise server on Windows
-
Download latest BuildWise release (in zip format) and unzip under a folder, suggest
C:/agilwayfor Windows, e.g.C:/agilway/buildwise-2.4.1. Follow this convention will make self-upgrade easier. -
Create database for BuildWise
C:\work> "C:\Program Files\MySQL\MySQL Server 5.7\bin\mysqladmin.exe" -uroot -p create buildwise_production
Enter password: *********
-
Clone test project locally
cd c:\work
git clone https://github.com/testwisely/buildwise-samples.git
-
Set database password in config/database.yml
Make sure putting a space afer
:, refer the sample. -
Change port number start-up.bat (optional)
By default, the port is set to
3618. You may change the port to the default HTTP port80, to do that, edit thestart-up.bat.
Start up server
Double click startup.bat (startup.sh on Mac/Linux) under the installation directory to start up BuildWise server.
C:\agileway\buildwise-2.4.1>startup.bat
git version 2.18.0.windows.1
== 1 CreateBuildQueues: migrating =============================================
-- create_table("build_queues", {:force=>true})
...
* Puma version: 6.4.2 (ruby 3.2.2-p53) ("The Eagle of Durango")
*  Min threads: 0
*  Max threads: 5
*  Environment: demo
*          PID: 8228
* Listening on http://0.0.0.0:3618
Use Ctrl-C to stop
then open http://localhost:3618 in your browser.

Login with default password: admin/buildwise (you can change the password later).
Install BuildWise on Mac or Linux
The installation process on Max or Linux is easier, as Ruby and Git are usually included with the distribution. If not, run one command using the package manager. For example, installing MySQL server will be brew install mysql on Mac and sudo apt-get install mysql-server on Ubuntu Linux.
While you can start up BuildWise with startup.sh, using Phusion Passenger behind Apache/Nginx is better.
BuildWise working directory
By default, BuildWise server on windows are installed under C:\agileway. It is good idea to keep previous versions there as well, you can always go back if something went wrong.
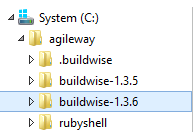
The important folder is C:\agileway\.buildwise, which contains
- project settings
- checked out project source
- build artifacts
© 2006 - 2026 AgileWay Pty Ltd. Powered by SiteWise CMS